

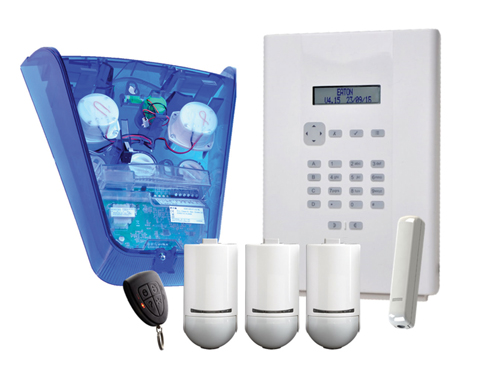
 The i-on Compact Security System is a wireless “entry-level intruder alarm” system and can be purchased as a kit as reviewed here and with a range of optional additional detector and sensor devices available. The panel handles up to 20 zones / devices with flexible configuration and a wide range of detection options.
Getting started
All necessary components for a basic grade 2 alarm system are included in the pack. The control unit includes the keypad and a two-line LCD display for user management and installer setup. Firstly, the control unit must be fixed in place and supplied with mains power using two-core cable from a suitable spur. With a single screw at the top of the panel, the front folds down giving access to the PCB and all connections. The back-up battery pack must be slotted into place and plugged into the main PCB.
PIR detectors are supplied with batteries (2 x AA size) installed with a removeable tab to prevent drain during transit and once removed they become active and are ready to be added to the system. This is simply a matter of activating the tamper switch of each device once the control panel is in Add Detector/Device mode. The devices are then added in turn until all are entered.
Each device is allocated to one of the twenty zones the panel supports and can be appropriately named, allocated a “type” and have its attributes set. The “type” for each device can be Normal, Entry Route, Final Exit, 24 Hour Alarm, Technical Alarm, Tamper, Log Only, Perimeter, Not Used, Holdup Alarm and Fire Alarm. Attributes include Supervision, Chime, Soak Test, Force Set Omit, Omittable and Part Set B, C or D.
Selectable wireless jamming detection is included for the key elements of the system.
Menu options
A conventional alarm menu approach is taken using the LCD display for navigation through the options. The control unit Quick Setup Guide includes an Installer Menu Map that identifies all available functions.
Access to the panel is by entering the four-digit Installer PIN followed by the four-digit User Pin number, a cursor navigation pad along with tick, cross and menu buttons are then used to work through the options.
Read the full review in the August 2019 edition of PSI magazine