

 The PoE+ powered, i-PRO WV-X15700-V2L is a mid-sized bullet style camera with a 1/1.8” 4K sensor and incorporating AI edge analytics. It has IP67 ingress protection and is IK10 impact rated.
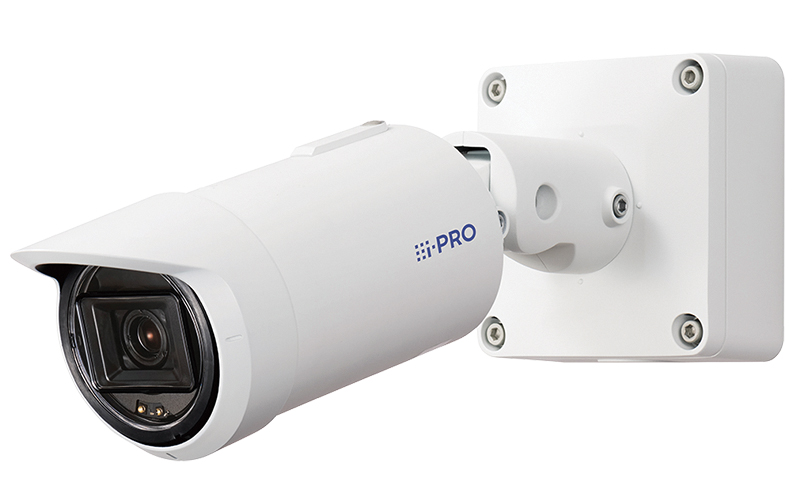
Getting started
The camera has a 13 x 13 cm mounting plate that mates with its supplied wall / ceiling adapter box. A transparent plastic grommet cover is provided that fits over the camera’s mounting plate to hold the grommets and environmentally seal the camera’s connections.
PoE+ power and network connectivity are provided via a short RJ45 flying lead from the rear of the camera. 12v DC supply is possible but requires an optional connection lead WV-QCA501A (not supplied). This connection lead mates with a 12-way multi-way socket on the cameras baseplate that also supports audio and alarm in / outputs.
PoE power demand is stated as approximately 14.0W and in operation gave readings around 13.5W to 14.1W including with IR illumination on.
The mounting bracket has adjustments for pan, tilt, and yaw to suit the mounting surface.
The camera’s body shell can be removed by loosening a single crosshead retaining screw and then rotating and sliding off the cover. This then gives access to the micro-SD card socket, three switches for SD On/Off, Tele, and Wide lens angle. Adjacent to these is an Initial Set button to restore defaults, with a pair of small LEDs above to indicate Link, and Network Activity. Finally, an RCA (phono) socket is available for monitor output, which for this model is set to PAL format. The storage card socket can accept microSDXC cards up to 512GB along with microSDHC or microSD cards at their lower maximum capacity limits.
Operation
Once powered, the camera is by default DHCP configured to the local network or can be set up using the i-PRO configuration tool available from their website. When first accessed via a web browser, the user is presented with an Administrator registration screen to set the initial admin password. The username can be from 1 to 32 characters, but the password must be between 8 and 32 characters and use at least three character types. Once set, you are prompted to log in with your new password.
A basic setup mode is then entered requiring language and date & time settings and once entered the live view screen is shown. Depending on display type, this will likely show stream two at 1920 x 1080 in H.265 at a reduced frame rate. Changing to H.264 increases the browser view update rate.
Icons at the top right of the display are for Snapshot, Live View, Image Comparison, Support Website, Full Screen, and Grid Display followed by Camera Control and Setup. The Live View icon gives a drop down set of options for Stream selection (1 to 4) along with JPEG and Multi-screen options. The Image Comparison allows before and after changes to be viewed prior to confirming and storing. The Grid display is to assist with setting viewing angles and perspective for some software applications.
The Gear icon for Setup brings up the basic menu options at the lower part of the window and reduces the live image area.
Read the full review in the April 2024 edition of PSI magazine