

 External lighting is widely accepted as one way to deter burglars so if you can combine this with a camera and PIR you have a much more useful tool at your disposal. Back in February 2015 we looked at a low energy LED security light called NightHawk LED from ESP which featured a floodlight output of 1100 lumens with a detection rate of 10m. This month we’re looking at its bigger brother the feature rich GuardCam LED available in the UK from distributor CEF.
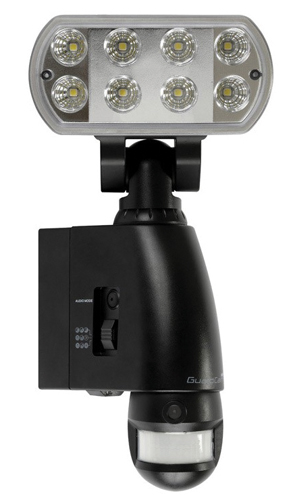
Installation
Fitting the unit to the wall follows the procedure for the NightHawk LED, screw the mounting plate to the surface and feed the cable through the bush and wire up the unit. Attach the light to the mounting plate angling the unit at the back so that it slots in neatly and screw the two parts together. Put the tools away, that’s it. However the fun is now about to begin as while the Night Hawk essentially had just two types of settings (light time, sensitivity) the GuardCam has more features than you would expect from something in its price range.
The first settings to determine are the usual time and sensitivity controls using two small knobs on the rear of the PIR. Time ranges from 5 seconds up to 7 minutes with detector range sensitivity from around 2m to 10m for the 160° PIR. A walk test setting allows you to adjust the time to the desired period with a marker at the 20secs point for reference.
Next you can choose which overall working mode you require. These are three modes that vary in the on/off settings of the three main functions, the light, the camera and the speaker. The speaker itself can be on or off and has five options these are:
1. Default – “Warning you are being recorded by a security camera” message
2. Dog barking
3. Self-recorded message 1 (max 10 secs)
4. Self-recorded message 2 (max 10 secs)
5. Off
The final stage of set-up involves the on board recording facility, which begins with inserting the supplied SD card and setting the date/time by using a scrolling LCD display on the side of the unit. Under the same cover is button to choose video or photo recording.
So that you know that you’ve done everything correctly there is a status light showing red for a problem and green for all being fine and that the unit is recording.
Read the full review in the September 2017 edition of PSI magazine