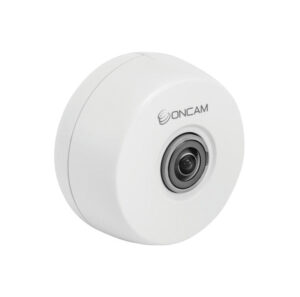
 This internal 360° view camera designed for ceiling or wall mounting is based on a 12MP sensor and provides a fisheye image with a wide range of configuration options.
Getting started
The Quick Start guide shows the basic methods to mount and connect the camera. It is PoE powered (<12.95W) with the advantage of either a direct RJ45 connection or a wired connection using the supplied “Punchdown” board that allows the network cable to be connected using an IDC punch down tool. The camera module is supplied out of its casing with packaging that allows access to the RJ45 for in-box configuration. The housing base can be fitted to a ceiling or wall surface using the drilling template and this allows for the alternative wiring formats to be accommodated. The Punchdown board if used is clipped into the back plate and the connections can be made for either T-568A or B configurations. Colour coding on the connector clarifies the conductors to be used for A or B.
With the base mounted to the surface the camera module which fits in the palm of your hand is clipped in and three captive security screws are tightened to secure it in place. If the Punchdown board is used, its RJ45 mates directly with the camera, otherwise the RJ45 should be inserted first. The top cover is then placed on and rotated to click into place.
Once connected to a PoE enabled network point, the camera will go through its start-up routine. The on-board LED illuminates Blue to indicate the OS is starting, then from Orange to Yellow to show firmware booting, White for network search and finally Green for operational. This LED can be used to indicate motion detection in the scene and can also indicate network errors and SD card problems or turned off. By default, the camera will be allocated a DHCP address if on a suitable network and can then be located using network tools or a search tool downloaded from the Oncam website.
On first connection to the camera’s web browser display, you must enter a username of 4 to 12 characters and a strong password of 8 to 32 characters with at least 1 upper case, 1 number and 1 special character with no repetitions or sequential characters allowed.
A detailed 233-page user manual can be downloaded from the Oncam website, and this covers all the camera’s features and configuration.
Menu options
The browser view displays the menu options down the left-hand side of the screen. At the top of the display area are the Camera’s model number and IP address followed by the Recording Status, a “Jump to” search box, an Expert Mode switch and a Log Out button. The “Jump to” box allows direct access to menu features without having to navigate through the sub-menus. The Expert mode adds some of the more advanced features to the sub menus.
Read the full review in the March 2022 edition of PSI magazine


