


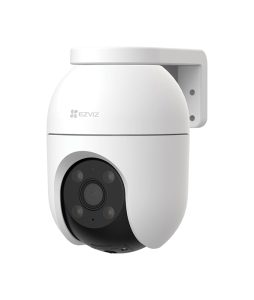
 The Ezviz C8c is promoted as a “Smart Home” device and is available as this 1080p, 2MP version or as a slightly more expensive 4MP option. It is based around a 1/2.8” CMOS sensor with a 4mm lens and includes pan and tilt control. AI based human detection with tracking is supported as standard.
Getting started
The camera is intended for the home user who is familiar with basic app-controlled setup, so is being reviewed here as it may be introduced into security systems by low-cost installers. It is clipped into its mounting bracket, and this can be easily removed for wall or ceiling mounting. A drilling template is provided but the plastic bracket can alternatively be used to space the 4 holes.
With a weight of just under 500 grammes the camera does not present a significant load. It is described as being of Weatherproof Design so may be suitable for outdoor use if in a reasonably protected or covered area, but the plastic case makes it vulnerable to intentional damage. The 12v power supply supports the camera’s 12W maximum demand and the 6m extension lead allows for a run of up to 7.4 metres. Network connectivity is via the flying lead RJ45 connector or internal Wi-Fi connection.
Once powered, the camera runs through a short initialisation phase with the camera panning and tilting to its end stops for position calibration, before centralising. It is then available for setup and control.
A microSD card slot for up to 512GB cards for local recording, is accessible beneath a removeable cover on the bottom of the camera. This cover includes a reset switch.
Configuration options
At the simplest level the camera is configured by downloading the Android or iOS app from the relevant app-store and following the instruction to add the camera as a device. A QR code on the camera’s base along with a 6-digit verification code, automates the process and quickly gives access to the live view and simple configuration options for the alarms, video, and audio. Prompts are given to add “Cloud” storage and Device Inspection through free trial periods.
This all seems straightforward, however, if you want to add the camera into a conventional NVR then there are a few hurdles to overcome. At first connection to a wired network, the camera did not initially accept a DHCP address, so it was necessary to use network tools such as Wireshark to identify the IP address. The camera does not have an onboard webserver so Ezviz makes available a software tool called Ezviz Studio, this can discover the camera and allows basic setup to be performed. But, in its supplied state it is quite limited. You must change its configuration file “AppConfig.ini” to add the Local Operation command “Show=1” to gain access to the Advanced configuration menu. Only then can network and advanced features be changed.
Once the IP address is known the camera could be readily added to an NVR using ONVIF protocol. This allowed pan and tilt control to be actioned from the NVR.
Read the full review in the August 2024 edition of PSi magazine